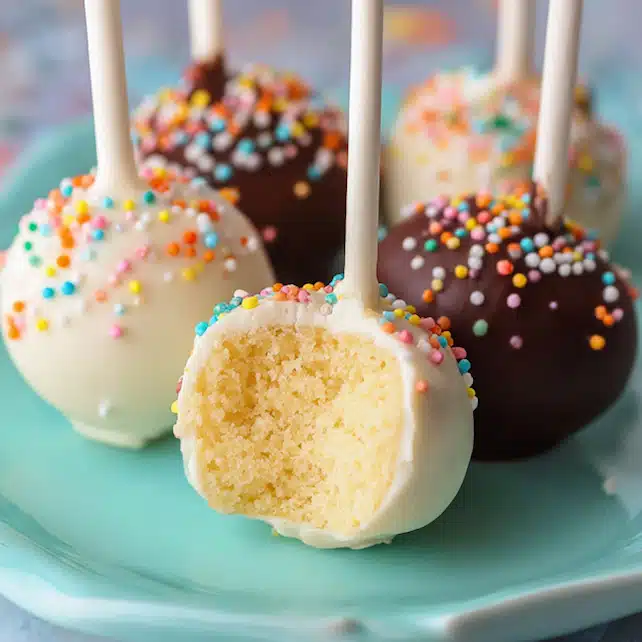
Cake popsicles—also known as cakesicles—are an absolute crowd-pleaser. Whether you’re prepping for a birthday bash, holiday dessert table, or just want a sweet treat with personality, this homemade cake popsicles recipe is a fun and creative way to serve cake on a stick. What makes this recipe stand out is that it’s 100% from scratch—no boxed cake mix, no store-bought frosting—just pure vanilla goodness combined with smooth buttercream, coated in silky chocolate, and topped with colorful sprinkles.
We’ll walk you through everything you need to make them, from baking the vanilla cake to dipping the chilled cake balls in rich chocolate. You’ll also get insider tips for shaping, chilling, decorating, and storing—so your cake popsicles look professional and taste even better.
Table of Contents

Cake Popsicles Recipe: The Best Homemade Treat Kids Love
- Total Time: 7 hours
- Yield: 40 pops 1x
- Diet: Vegetarian
Description
Homemade cake popsicles recipe made with vanilla cake, vanilla buttercream, and dipped in white chocolate. No cake mix or canned frosting—just 100% from-scratch sweetness.
Ingredients
1 and 2/3 cups (209g) all-purpose flour (spooned & leveled)
1/2 tsp baking powder
1/4 tsp baking soda
1/2 tsp salt
1/2 cup (113g) unsalted butter, softened
1 cup (200g) granulated sugar
1 large egg, room temperature
2 tsp pure vanilla extract
1 cup (240ml) whole milk or buttermilk
Frosting:
7 Tbsp (99g) unsalted butter, softened
1 and 3/4 cups (210g) confectioners’ sugar
2–3 tsp heavy cream or whole milk
1 tsp pure vanilla extract
Coating:
24 oz (678g) candy melts or white chocolate
Sprinkles
Instructions
1. Preheat oven to 350°F (177°C) and grease a 9-inch springform pan.
2. In a bowl, whisk flour, baking powder, baking soda, and salt.
3. In a separate bowl, cream butter and sugar for 2 minutes.
4. Add egg and vanilla extract; beat until combined.
5. Add dry ingredients and milk; mix until smooth.
6. Bake for 30–36 mins until toothpick comes out clean. Let cool completely.
7. Make frosting: Beat butter until creamy. Add sugar, cream, and vanilla; beat 3 mins.
8. Crumble cooled cake into frosting and mix into a moldable dough.
9. Roll into balls (1 Tbsp each) and refrigerate for 2 hours or freeze 1 hour.
10. Melt chocolate/candy melts in microwave or double boiler.
11. Dip lollipop stick in coating, then insert into cake pop.
12. Dip whole pop in coating, tap off excess, and add sprinkles.
13. Place upright in styrofoam block or box until coating sets (1 hour).
14. Store in fridge up to 1 week or freeze up to 6 weeks.
Notes
You can freeze undipped cake balls for up to 6 weeks.
Let chocolate sit for 5 mins before dipping to avoid cracks.
Use candy molds to shape into popsicles for a fun twist.
- Prep Time: 2 hours
- Cook Time: 36 minutes
- Category: Dessert
- Method: Baking
- Cuisine: American
Nutrition
- Serving Size: 1 pop
- Calories: 190
- Sugar: 16g
- Sodium: 45mg
- Fat: 9g
- Saturated Fat: 5g
- Unsaturated Fat: 3g
- Trans Fat: 0g
- Carbohydrates: 25g
- Fiber: 0g
- Protein: 2g
- Cholesterol: 25mg
Introduction to Cake Popsicles
What Are Cake Popsicles?
Cake popsicles—or cakesicles—are just what they sound like: a delightful hybrid of cake and popsicle, but without the melting mess. These adorable treats are made by combining crumbled cake with buttercream, shaping the mix into popsicle molds (or hand-rolled balls), and dipping them in melted chocolate or candy melts. The final touch? Sprinkles, drizzles, and color coatings that match your occasion or theme.
These treats offer the convenience of a handheld dessert with the rich flavor of cake. You don’t need a fork or plate, and kids absolutely adore them.
Why They’re So Popular at Events & Cafés
There’s a reason cake popsicles are everywhere—from weddings to Starbucks counters. They’re:
- Perfectly portioned
- Easy to customize
- Kid-friendly and mess-free
- Visually eye-catching
- Ideal for make-ahead desserts
Because they freeze beautifully and hold their shape for days, they’re a smart choice for event planners, bakers, and parents. Whether you’re crafting unicorn-themed popsicles or keeping it classic with vanilla and sprinkles, these treats deliver every time.
Don’t miss our Snickers strawberry cheesecake recipe if you’re into creative dessert mashups.
Ingredients for the Perfect Cake Popsicles Recipe
Homemade Vanilla Cake Base Ingredients
To make cake popsicles from scratch, you’ll start with a simple yet flavorful vanilla cake that’s soft, moist, and easy to crumble. Unlike boxed cake mixes, this homemade version uses pantry staples and delivers a fresh, buttery flavor that sets your popsicles apart.
Here’s what you’ll need for the vanilla cake base:
| Ingredient | Amount |
|---|---|
| All-purpose flour | 1 ⅔ cups (209g) |
| Baking powder | ½ teaspoon |
| Baking soda | ¼ teaspoon |
| Salt | ½ teaspoon |
| Unsalted butter (softened) | ½ cup (113g) |
| Granulated sugar | 1 cup (200g) |
| Egg (large, room temperature) | 1 |
| Pure vanilla extract | 2 teaspoons |
| Whole milk or buttermilk | 1 cup (240ml) |
This base gives the cake a strong structure yet leaves it tender and soft—ideal for crumbling later.
Pro Tip: Always spoon and level your flour to avoid a dense cake. And make sure your butter is room temperature—this helps create the creamiest, most evenly mixed batter.
Check out our Japanese cheesecake recipe if you’re a fan of airy, melt-in-your-mouth cake textures.
Vanilla Buttercream Frosting Essentials
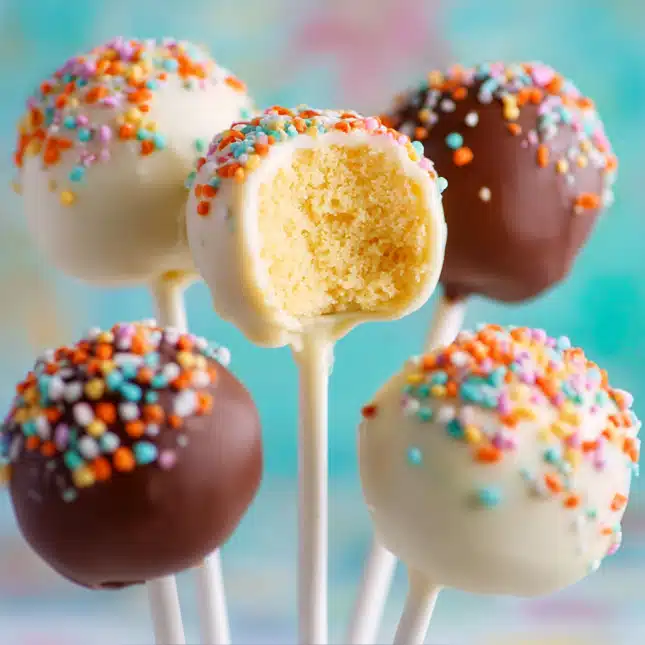
Once your cake is baked and cooled, you’ll mix it with homemade vanilla buttercream—this is what gives cake popsicles that smooth, dough-like consistency that can be easily molded and dipped.
Here’s what you need for the frosting:
| Ingredient | Amount |
|---|---|
| Unsalted butter (softened) | 7 tablespoons (99g) |
| Confectioners’ sugar | 1 ¾ cups (210g) |
| Heavy cream or whole milk | 2–3 teaspoons |
| Pure vanilla extract | 1 teaspoon |
This small-batch frosting is just enough to bind the cake crumbs. You’re not making cupcakes here, so don’t overdo the frosting—it’ll make the mixture greasy and hard to roll.
The magic is in the balance: soft cake meets lightly sweet, whipped frosting. The result? A rich, truffle-like dough that holds together perfectly when dipped in chocolate.
Learn more about balancing flavors with our pistachio muffin recipe.
Ingredient Substitutions & Flavor Boosts
Want to mix things up? Try these:
- Swap vanilla extract for almond or coconut extract.
- Use buttermilk instead of milk for extra richness.
- Add a dash of lemon zest for a citrusy twist.
You can also experiment with natural food colorings or cocoa powder to tint your batter or frosting subtly.
Discover great ideas like the Japanese pink salt recipe to give your desserts a surprising kick.
Preparing the Cake Base from Scratch
Step-by-Step Guide to Mixing and Baking the Vanilla Cake
Making a cake from scratch isn’t just rewarding—it’s the secret to cake popsicles that actually taste homemade. This vanilla cake recipe creates the soft, fluffy texture you need to form perfect pops without relying on a boxed mix.
Here’s how to do it right:
- Preheat Your Oven:
Set the temperature to 350°F (177°C) and grease a 9-inch springform pan or an 11×7-inch baking pan. If your cake rises too high, don’t panic—that’s normal with this recipe. - Dry Ingredients First:
In a medium bowl, whisk together:- 1 ⅔ cups all-purpose flour
- ½ tsp baking powder
- ¼ tsp baking soda
- ½ tsp salt
- Cream the Butter and Sugar:
In a separate large bowl, beat ½ cup softened butter and 1 cup granulated sugar for about 2 minutes until light and fluffy. This step is crucial—it traps air in the batter for a lighter cake. - Add Egg and Vanilla:
Beat in 1 large egg and 2 tsp pure vanilla extract. Scrape down the bowl as needed. - Mix Wet and Dry:
Alternate adding your dry ingredients and 1 cup milk or buttermilk into the butter mixture. Start and end with dry. Mix until just combined. - Bake It:
Pour the thick batter into your prepared pan. Bake for 30–36 minutes or until a toothpick inserted into the center comes out clean. - Cool Completely:
Let the cake cool in the pan on a wire rack. Do not crumble it while it’s warm—it’ll turn mushy.
Make-ahead tip: You can bake the cake a day before and keep it covered at room temperature. This saves time and allows you to jump into the fun part—frosting and shaping.
Cooling and Storing the Cake for Best Results
Once baked, allow the cake to cool completely before breaking it into crumbs. Warm cake will cling together and create a soggy mess.
How to store before use:
- Short term: Wrap in plastic wrap and store at room temp for up to 24 hours.
- Long term: Wrap tightly and freeze for up to 2 months. Thaw overnight in the fridge before using.
Don’t miss our rice krispie ice cream sandwich recipe for another make-ahead summer favorite.
The cake base is now ready, moist but firm enough to hold its shape—and it’s time to turn it into delicious popsicles.
Crafting the Frosting – The Secret Flavor Booster
Whipping Up the Perfect Vanilla Buttercream
If the vanilla cake is the body of your cake popsicles, the frosting is the soul. It binds the crumbs into that rich, truffle-like dough and adds just enough sweetness to keep the final treat soft and decadent—not dry or overly sweet.
Here’s how to make from-scratch vanilla buttercream:
- Cream the Butter:
In a mixing bowl, beat 7 tablespoons (99g) of unsalted butter (softened to room temperature) on medium speed for about 2 minutes, until light and smooth. - Add the Sugar:
Add 1¾ cups (210g) confectioners’ sugar gradually, beating on low speed to avoid sugar clouds. Once incorporated, increase to medium-high for another 2 minutes. - Finish With Liquid:
Add 2–3 teaspoons of heavy cream or whole milk and 1 teaspoon of vanilla extract. Beat everything together on high speed for 3 full minutes. The result should be creamy, light, and just thick enough to hold structure.
This isn’t cupcake frosting—it’s frosting designed to hold your cake together, not overpower it. The goal is just enough moisture to mold the crumbs into a ball that won’t fall apart when dipped.
How Much Frosting to Use and Why It Matters
Here’s the golden rule: Less is more.
Too much frosting and your cake popsicles will be:
- Greasy
- Sloppy to roll
- Likely to slide off the stick during dipping
The perfect ratio is about 1 cup of frosting per entire baked cake layer (which is exactly what the recipe above yields). You’re aiming for a play-dough-like consistency—smooth, pliable, and able to hold a shape when rolled.
If you overdo it, don’t worry. You can always add more cake crumbs to absorb the excess.
Looking for more texture ideas? Check out our rice crispy ice cream sandwiches for that delightful crunch-meets-creamy balance.
Quick Troubleshooting Table
| Problem | Likely Cause | Solution |
|---|---|---|
| Dough too sticky | Too much frosting | Add more cake crumbs |
| Dough falling apart | Too little frosting or too dry | Add small amount of cream |
| Greasy texture | Butter too warm or overmixed | Chill frosting before combining |
Mixing Cake and Frosting – The Truffle Transformation
How to Crumble and Blend Like a Pro
Now that you’ve baked your vanilla cake and whipped up the smoothest vanilla buttercream, it’s time to combine the two into the ultimate cake popsicle dough.
This step is where the magic happens—it’s what gives cake popsicles their signature texture: moist, dense, and perfectly shaped to hold on a stick.
Here’s how to get it right:
- Crumble the Cake:
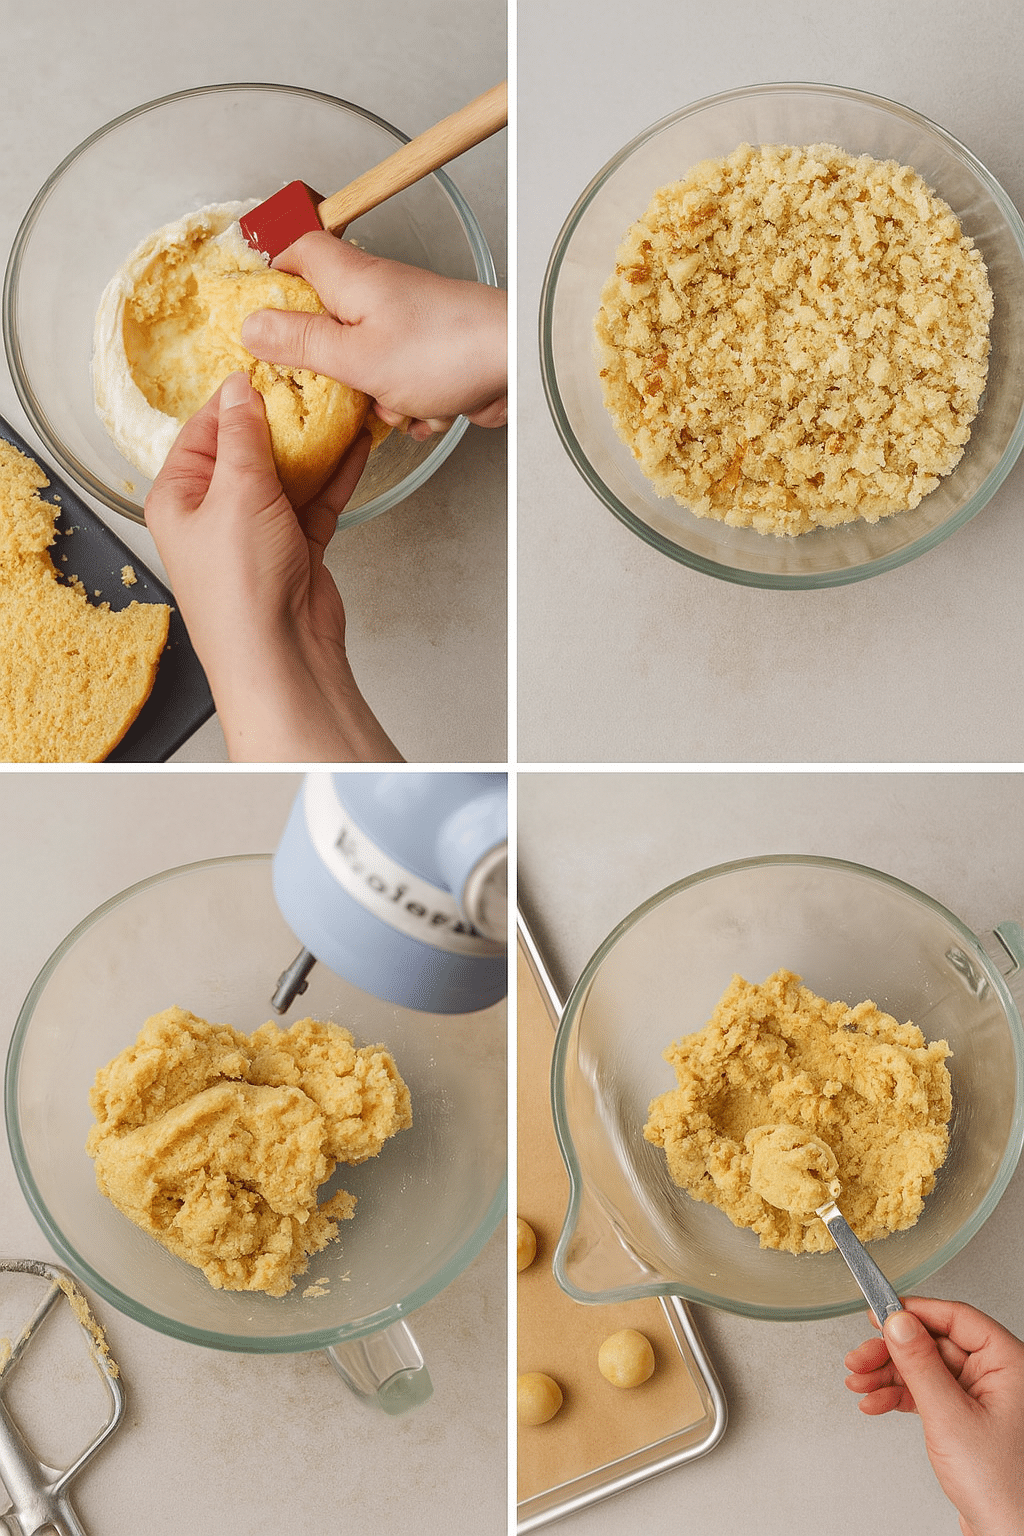
Break the fully cooled vanilla cake into chunks and place them in a large bowl. You can crumble by hand or use a stand mixer on low speed. Make sure to remove any overly crispy edges. - Add the Frosting:
Add the vanilla buttercream a little at a time. You don’t want to overdo it. Start with ½ cup, mix, and test the consistency. If it still crumbles apart, add more. - Test the Dough:
Grab a tablespoon of the mix and roll it into a ball. If it holds its shape without sticking too much to your hands, it’s perfect. It should feel similar to playdough—soft, pliable, and dense.
Pro Tip: A stand mixer on low speed works great to combine the cake and frosting evenly. Just be sure not to overmix—it’ll turn the dough gummy.
Avoiding Over-Mixing for Ideal Texture
You might think more mixing leads to a smoother result, but in this case, less is more. Over-mixing can:
- Break down the cake too much
- Turn the dough sticky and greasy
- Make it hard to roll clean shapes
Instead, stop mixing as soon as the cake and frosting are fully incorporated. You should still see a bit of crumb texture, not a completely homogenous paste.
Visual Guide: Dough Consistency
| Texture | Result |
|---|---|
| Dry, crumbly | Add more frosting |
| Wet, greasy | Add more cake crumbs or chill dough |
| Just right | Rolls easily and holds shape |
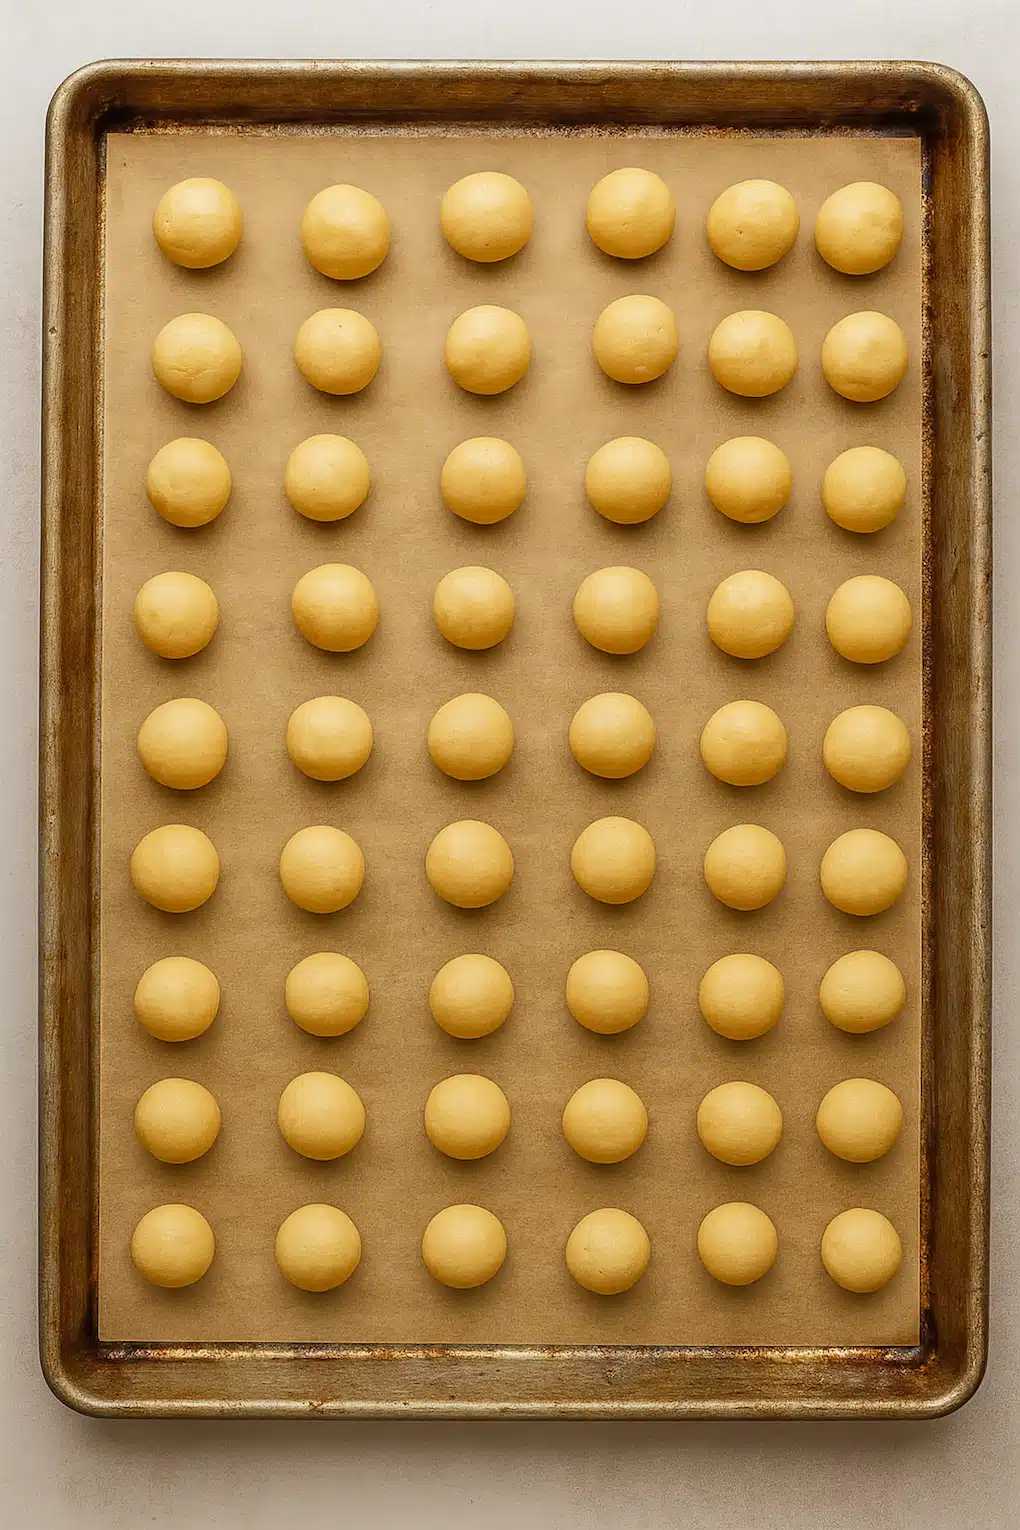
Once your dough is ready, roll it into 1-tablespoon balls and place them on a parchment-lined baking sheet. You can also press the dough into silicone popsicle molds for that flat, ice-cream-on-a-stick look.
Refrigerate for at least 2 hours (or freeze for 1 hour) before dipping. Chilled dough is easier to handle, coats better, and holds its shape perfectly.
Shaping, Chilling, and Dipping Your Cake Popsicles
Rolling and Cooling the Balls for Smooth Results
Once your cake-and-frosting mixture is ready, it’s time to shape your popsicles. Whether you want the traditional round cake pop or a flat popsicle shape, chilling is key to success.
Here’s how to shape them perfectly:
- Scoop & Roll:
Use a tablespoon or small cookie scoop to portion out the dough. Roll each portion into a tight, uniform ball or press into silicone popsicle molds for that signature cakesicle shape. - Chill the Pops:
Place the shaped cake balls or cakesicles on a parchment-lined baking sheet. Chill them in the refrigerator for at least 2 hours, or freeze for 1 hour if you’re short on time. This firms up the dough, making it much easier to dip without crumbling or sliding off the stick. - Re-roll if Needed:
After chilling, roll each ball one more time to smooth out any rough spots. You’ll be amazed how much easier it is to get that perfect shape once they’re cold.
Why this step matters: Cold dough helps the chocolate coating adhere better, prevents cracking, and ensures the pop stays securely on the stick.
White Chocolate vs Candy Melts: Which Is Best?
Now for the fun part—dipping your cake popsicles in a dreamy, smooth coating.
You’ve got options here:
🍫 White Chocolate (Premium Choice)
- Rich, creamy, and delicious
- Smooth finish with natural flavor
- Best taste, but can be pricier
- Requires gentle melting and tempering
🍬 Candy Melts (Budget-Friendly Option)
- Easy to melt and tint
- Sets quickly, perfect for beginners
- Available in many colors
- Slightly waxier taste than real chocolate
Dipping Tips:
- Use a 2-cup liquid measuring cup for the perfect dunking depth.
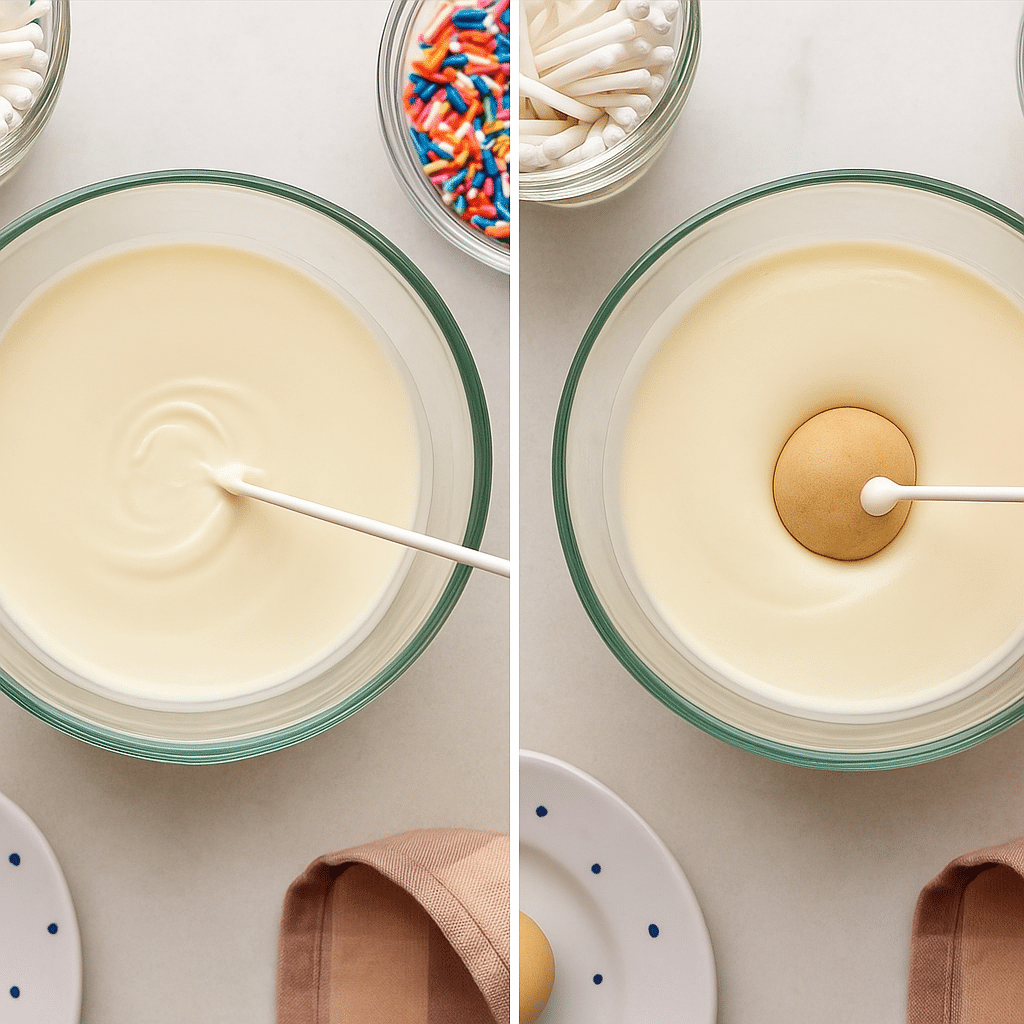
- Melt chocolate in the microwave in 20-second intervals, stirring between each until smooth.
- Let melted coating cool for 5 minutes before dipping cold cake balls. This helps prevent cracks.
Stick it right: Dip one end of the lollipop stick about ½ inch into the melted chocolate, then insert into the center of the cake ball. This “glue” helps the stick stay in place.
Troubleshooting Common Dipping Issues
| Issue | Cause | Solution |
|---|---|---|
| Pops cracking | Chocolate too hot | Let it cool for 5 min before dipping |
| Pops sliding off | Cake too warm or loose | Chill longer; dip stick tip first |
| Lumpy coating | Chocolate too thick | Add ½ tsp oil to thin it |
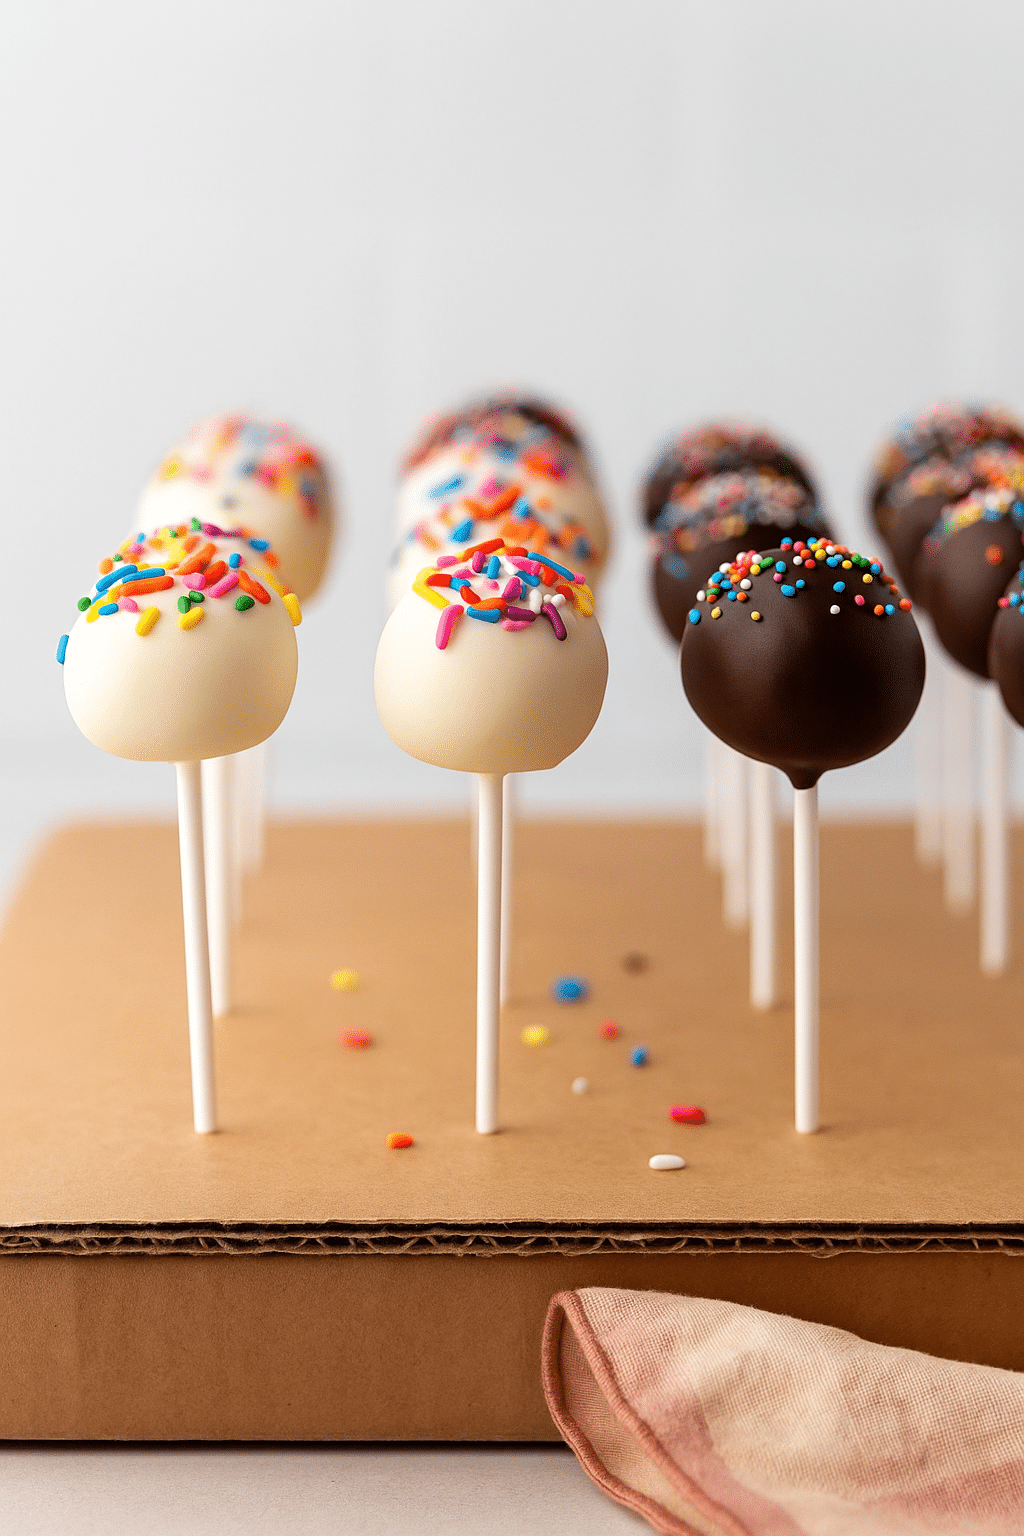
Once dipped, insert the sticks into a styrofoam block or a box with holes poked—this allows the cake pops to stand upright and dry without smudging.
Let the coating set for about 1 hour at room temperature. If you’re adding sprinkles, do so immediately after dipping, while the coating is still wet.
Decorating and Setting the Cake Popsicles
Adding Sprinkles, Colors, and Fun Flavors
The decoration stage is where your cake popsicles recipe truly comes to life. After dipping the chilled pops in chocolate or candy melts, it’s time to get creative. Whether you’re making these for a birthday party, holiday, or just a sweet treat with the kids, adding eye-catching toppings can turn your popsicles from simple to spectacular.
Here are some fun topping ideas:
- Rainbow sprinkles for a classic kid-friendly look
- Crushed nuts for crunch and elegance
- Drizzled white or dark chocolate for a gourmet twist
- Mini marshmallows, edible glitter, or coconut flakes for themed pops
Want to match a party color? Use gel food coloring to tint white chocolate in pastels, bold neons, or any custom shade. Remember, candy melts come pre-colored and are ideal for quick, mess-free decorating.
To prevent smearing or smudging, always decorate immediately after dipping—while the coating is still wet.
Looking for inspiration? Try our coffee lemon weight loss drink to balance out all the sweet baking!
Drying, Displaying, and Storing Techniques
Once your cake popsicles are decorated, you’ll need to let the coating set completely. The best way to do this is by placing them upright in a styrofoam block, cake pop stand, or cardboard box with small holes poked into the top.
Drying time:
- At room temperature: ~1 hour
- In the fridge: 15–20 minutes for a quicker set
Storage Tips for Your Cake Popsicles Recipe:
- At room temp: Up to 3 days in a sealed container
- In the fridge: Up to 1 week
- In the freezer: Up to 6 weeks (freeze in layers with parchment paper)
To thaw, simply place the cake popsicles in the fridge overnight before serving. The coating stays smooth, and the inside stays fresh and moist.
Why Decorations Matter in a Cake Popsicles Recipe
When creating a homemade cake popsicles recipe, looks matter just as much as taste—especially if you’re serving them at events. From rainbow-themed birthday parties to elegant weddings, well-decorated cake popsicles double as both dessert and décor.
Extra Tips:
- Use parchment paper under your drying stand to catch drips
- Don’t crowd your tray—space them out for clean edges
- Personalize with candy eyes, edible letters, or custom tags for party favors
Expert Cake Popsicle Tips & Troubleshooting
Preventing Cracks and Cake Falls
Even when you follow a cake popsicles recipe step-by-step, little things can go wrong. Luckily, most of these issues are common and totally fixable. Here’s how to avoid the most frequent mishaps.
Problem: The coating cracks after setting.
Cause: The chocolate was too hot, and the cake popsicles were too cold.
Fix: Let the chocolate cool for 5 minutes before dipping. Also, allow your pops to sit at room temp for 5–10 minutes after chilling before dunking.
Problem: Cake pops slide off the stick.
Cause: The dough was too soft or the stick wasn’t secured.
Fix: Always dip the stick into melted chocolate first, then insert it halfway into the pop. This acts like glue and helps the cake hold on tight.
Problem: Coating is clumpy or uneven.
Cause: Overheated or thick chocolate.
Fix: Add ½ tsp vegetable oil to thin it out. Stir constantly during melting and use a tall, narrow container for dipping.
By avoiding these common mistakes, your cake popsicles recipe will look just as professional as those on display at bakeries or cafés.
Storage, Transport, and Make-Ahead Tips
One of the best parts about this cake popsicles recipe is how convenient and make-ahead friendly it is. Whether you’re baking for a party or prepping for the week, these treats are easy to store, freeze, and even transport.
Here’s what you need to know:
📦 Storage Guidelines:
| Location | Duration | Notes |
|---|---|---|
| Room Temp | 2–3 days | Keep in an airtight container |
| Refrigerator | Up to 1 week | Let come to room temp before serving |
| Freezer | Up to 6 weeks | Use parchment between layers |
🚗 Transport Tips:
- Store cake popsicles upright in a cake pop stand or box with dividers.
- Avoid direct sunlight or hot environments.
- Pack with freezer packs if traveling more than 30 minutes.
Make-ahead bonus: You can bake the cake a day ahead, and even shape and freeze the undipped pops up to 6 weeks in advance. Just thaw in the fridge and dip fresh before serving.
Why These Tips Improve Your Cake Popsicles Recipe
Perfecting a homemade cake popsicles recipe isn’t just about taste—it’s also about structure, shelf life, and appearance. These expert tricks not only prevent sticky issues, but they also make your baking process smoother, faster, and way more enjoyable.
Remember, even seasoned bakers encounter cracked coatings or sliding sticks. What matters is learning how to troubleshoot like a pro and make your next batch even better.
Flavor Variations and Creative Twists
Chocolate Cake Popsicles & Other Fun Flavors
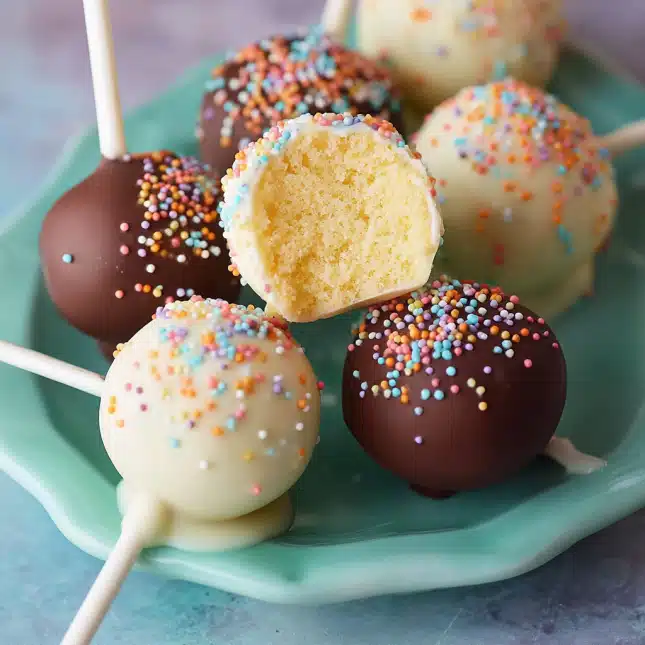
One of the best things about this cake popsicles recipe is how easy it is to adapt it with new flavors. Once you’ve mastered the vanilla base, you can start experimenting with exciting combinations that fit any occasion, craving, or seasonal vibe.
Here are some popular variations:
- Chocolate Cake Popsicles Recipe:
Swap the vanilla cake for rich chocolate cake and use chocolate buttercream. Dip in dark or milk chocolate and top with crushed cookies or sea salt. - Strawberry Shortcake Popsicles:
Add freeze-dried strawberries to your vanilla frosting and dip in white chocolate. Sprinkle with crushed vanilla wafers. - Red Velvet Cake Popsicles:
Use a classic red velvet base and cream cheese frosting. Dip in white or dark chocolate and drizzle with red candy melt. - Lemon or Orange Popsicles:
Add lemon or orange zest to the vanilla cake and use a citrus-infused glaze instead of traditional coating for a summer twist. - Birthday Cake Popsicles:
Mix rainbow sprinkles directly into the batter or dough and use vanilla almond bark for dipping. Add even more sprinkles on top for that party pop.
This cake popsicles recipe isn’t just delicious—it’s also a template for creativity. Mix and match cakes, frostings, and coatings to develop your signature flavor.
Looking for indulgent inspiration? Don’t miss our Tom Cruise coconut cake—it’s rich, moist, and flavor-packed.
Popsicle Stick Hacks & Presentation Tips
When it comes to presentation, your cake popsicles recipe can truly shine with a few smart display ideas:
🍭 Stick Hacks:
- Use colorful wooden sticks to match your theme.
- Tie ribbons or name tags around the base of each stick for personalized party favors.
- Use edible glitter or metallic spray on the sticks for weddings or formal events.
🎁 Packaging & Display Tips:
- Arrange in mason jars filled with sugar, rice, or beads to keep upright.
- Wrap each pop in clear treat bags and secure with a twist tie for gifting.
- Use a tiered cake pop stand to create a stunning dessert table centerpiece.
This cake popsicles recipe isn’t just a treat—it’s a dessert showpiece. With some creativity, you’ll have a dessert that looks like it came straight from a bakery.
Learn more about creative treat displays in our warhead fruit riot recipe, perfect for themed events and bold flavors.
🎉 Conclusion: Why This Cake Popsicles Recipe Is a Must-Try
Whether you’re prepping for a party, planning ahead for holiday treats, or just looking to have fun in the kitchen, this cake popsicles recipe delivers every time. It combines homemade cake, fresh vanilla buttercream, and creamy chocolate coating into the ultimate handheld dessert that kids and adults love.
From mixing the perfect dough to decorating with flair, you now have all the tools to make bakery-quality cake popsicles right in your kitchen. With simple ingredients, versatile flavor options, and make-ahead flexibility, this is a cake popsicles recipe you’ll come back to again and again.
Don’t miss our creative dessert twists like the rice krispie treat ice cream sandwiches for even more homemade fun.
FAQ
How far in advance can I make cake popsicles?
You can make this cake popsicles recipe several days in advance. The cake can be baked and stored for 1 day at room temperature, and shaped cake popsicles can be frozen (undipped) for up to 6 weeks. Once dipped and decorated, store them in the fridge for up to 1 week or in the freezer for longer storage. Just thaw overnight before serving.
What is the trick to making cake pops?
The trick to a successful cake popsicles recipe lies in texture and temperature. The cake and frosting mixture should be firm enough to roll but not dry. Chill your shaped popsicles before dipping to prevent sliding and cracking. Also, always dip the stick in coating before inserting into the dough—this anchors the pop and prevents it from falling off.
What’s the difference between a popsicle and a cakesicle?
A popsicle is a frozen dessert made with juice or dairy, while a cakesicle—like in this cake popsicles recipe—is a molded cake and frosting mixture coated in chocolate. Cakesicles are not frozen, and they resemble popsicles only in appearance, using similar molds or sticks.
How to make cake pops freeze?
To freeze cake pops, make sure they’re fully set and decorated. Place them in a freezer-safe container with layers of parchment paper. Seal the container tightly to avoid freezer burn. This cake popsicles recipe freezes well for up to 6 weeks—just thaw overnight in the fridge before serving.
