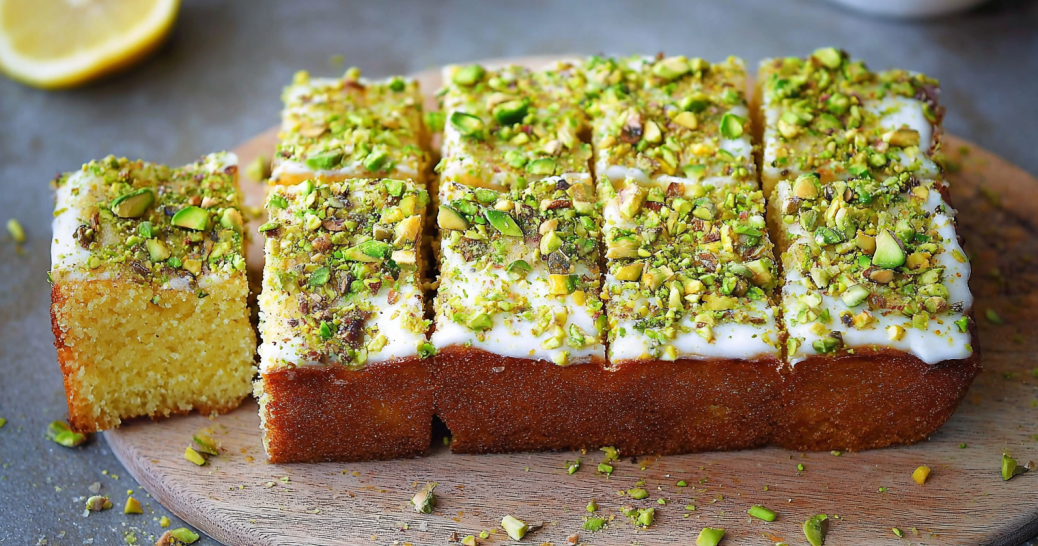

When the air turns crisp and the leaves start changing, there’s nothing quite like cozying up with a dessert that captures the flavors of fall. These no bake pumpkin biscoff cheesecake bars are everything you love about autumn in one bite. They combine a buttery, spiced Biscoff cookie crust with a silky pumpkin cheesecake filling that’s rich, creamy, and perfectly balanced with hints of cinnamon, nutmeg, and vanilla.
The best part? You don’t need an oven. This no bake dessert comes together quickly and chills beautifully, making it perfect for busy holiday schedules or last-minute get-togethers. Whether you’re prepping for Thanksgiving or simply craving something sweet and seasonal, these bars are guaranteed to impress. The blend of pumpkin and Biscoff delivers comfort, flavor, and a touch of indulgence that turns an ordinary day into something special.
If you’ve been searching for an easy fall dessert that feels festive but doesn’t require complicated baking steps, this recipe checks every box. These no bake pumpkin biscoff cheesecake bars look stunning on the table, slice neatly, and taste even better than they look. Now let’s see why this combination works so perfectly together.
Table of Contents
Why These No Bake Pumpkin Biscoff Cheesecake Bars Work So Well
The Perfect Fall Dessert Combo
Pumpkin and Biscoff cookies are a match made for autumn. The creamy pumpkin cheesecake filling brings a smooth, velvety texture, while the Biscoff crust adds crunch and spice that balances every bite. The caramelized flavor of the cookies complements the earthy sweetness of pumpkin, creating a dessert that feels both cozy and luxurious. This flavor combination instantly reminds you of holiday gatherings, family dinners, and the comforting warmth of fall.
What makes these no bake pumpkin biscoff cheesecake bars stand out is their simplicity. There’s no oven, no water bath, and no stress. The crust comes together with crushed cookies and melted butter, while the filling blends into a silky mix of cream cheese, pumpkin, and whipped cream. Each layer sets in the refrigerator, giving you time to prepare other dishes or just enjoy your evening while dessert takes care of itself.
The No-Bake Convenience Factor
No bake desserts are the hidden heroes of the holiday season. When your oven is full of main dishes and sides, having a chilled dessert ready to go is a huge relief. These pumpkin biscoff cheesecake bars save time and energy without sacrificing taste or texture. You can prepare them a day ahead, let them chill overnight, and serve them straight from the fridge when it’s time for dessert.
Because the filling relies on whipped cream and cream cheese for structure, it firms up beautifully as it chills. The result is a light yet satisfying texture that melts in your mouth. This no bake method also prevents overbaking or cracks that often happen with traditional cheesecakes. It’s an easy, foolproof way to make a dessert that looks professional but takes minimal effort.
Another advantage of this method is flexibility. You can customize these bars to suit your taste by adjusting the spice blend, swapping sweeteners, or adding a drizzle of caramel sauce on top. Whether you’re serving them for Thanksgiving, Friendsgiving, or a cozy night in, these no bake pumpkin biscoff cheesecake bars will quickly become a seasonal favorite.
Key Ingredients for No Bake Pumpkin Biscoff Cheesecake Bars
Print
No Bake Pumpkin Biscoff Cheesecake Bars: The Ultimate Fall Dessert
- Total Time: 6 hours 25 minutes
- Yield: 12 bars 1x
- Diet: Vegetarian
Description
Creamy, spiced, and layered with a buttery Biscoff crust, these no-bake pumpkin biscoff cheesecake bars are the ultimate fall dessert.
Ingredients
2 cups Biscoff cookie crumbs (about 24 cookies)
½ cup unsalted butter, melted
16 oz cream cheese, softened
1 cup pumpkin purée
½ cup Greek yogurt or sour cream
½ cup powdered sugar
¼ cup maple syrup or honey
1 tsp vanilla extract
1½ tsp pumpkin pie spice
1 cup whipped cream
Optional: Extra whipped cream, crushed Biscoff cookies, pumpkin pie spice
Instructions
1. Crush Biscoff cookies and mix with melted butter. Press into a parchment-lined 9×9 baking dish and chill.
2. Beat cream cheese until smooth. Add pumpkin, yogurt, sugar, syrup, vanilla, and spice. Mix well.
3. Fold in whipped cream gently.
4. Spread filling over crust and smooth the top.
5. Refrigerate for at least 6 hours or overnight.
6. Slice and garnish with whipped cream and crushed cookies.
Notes
Make-ahead friendly for up to 2 days.
Wrap and freeze individual bars for up to 2 months.
Use plant-based alternatives for a dairy-free version.
- Prep Time: 25 minutes
- Cook Time: 0 minutes
- Category: Dessert
- Method: No-bake
- Cuisine: American
Nutrition
- Serving Size: 1 bar
- Calories: 312
- Sugar: 21 g
- Sodium: 215 mg
- Fat: 19 g
- Saturated Fat: 11 g
- Unsaturated Fat: 7 g
- Trans Fat: 0 g
- Carbohydrates: 33 g
- Fiber: 2 g
- Protein: 4 g
- Cholesterol: 54 mg
Core Ingredients and Their Roles

To make these no bake pumpkin biscoff cheesecake bars, you only need a handful of simple, flavorful ingredients. Each one plays a specific part in building that smooth pumpkin cheesecake filling and spiced cookie crust.
Biscoff cookies: These are the foundation of the crust. Their caramelized, spiced flavor gives depth to the base and pairs perfectly with the creamy pumpkin filling. When crushed and combined with butter, they form a firm, slightly crunchy layer that balances the soft cheesecake topping.
Unsalted butter: Butter binds the Biscoff crumbs together, ensuring the crust stays firm and sliceable. It also adds a subtle richness that complements the cookie’s spice notes.
Cream cheese: This is the heart of any cheesecake. Full-fat cream cheese gives the filling its velvety, slightly tangy flavor and a dense yet creamy consistency. It’s best to let it soften before mixing so it blends smoothly.
Pumpkin puree: Pure pumpkin puree adds earthy sweetness, moisture, and a natural orange hue. It’s important to use plain pumpkin puree rather than pumpkin pie filling, which already contains sugar and spices.
Greek yogurt or sour cream: A touch of tang keeps the filling light and fresh, balancing the sweetness of the other ingredients. Either option works, depending on your preference.
Powdered sugar: Powdered sugar dissolves easily and adds sweetness without graininess, helping the filling stay smooth and stable.
Maple syrup or honey: These natural sweeteners enhance the fall flavor and add moisture. Maple syrup, in particular, deepens the autumn warmth of the dessert.
Pumpkin pie spice: The blend of cinnamon, nutmeg, ginger, and cloves ties all the flavors together, creating that unmistakable cozy aroma of fall.
Vanilla extract: A small amount of vanilla rounds out the flavor profile and enhances the natural sweetness of the pumpkin.
Whipped cream: Folding in whipped cream gives the filling a light, mousse-like texture. It keeps the bars soft and airy while maintaining a rich taste.
Substitution Ideas for Dietary Needs
You can easily adapt this recipe to meet different dietary preferences without losing its signature taste or texture.
For a dairy-free version: Use dairy-free cream cheese, coconut yogurt, and coconut whipped cream. These alternatives keep the filling creamy while adding a slight tropical note that pairs surprisingly well with pumpkin and spice.
For a gluten-free crust: Replace Biscoff cookies with gluten-free ginger snaps or spiced oat cookies. Choose a cookie that offers a similar warm, spiced flavor to maintain the dessert’s balance.
Sweetener swaps: Maple syrup can be replaced with agave syrup for a lighter sweetness or with brown sugar for a deeper caramel undertone.
Pumpkin spice alternatives: If you don’t have pumpkin pie spice, you can create your own by mixing 1 teaspoon cinnamon, ¼ teaspoon nutmeg, and a pinch each of ginger and cloves.
Lower-sugar option: Reduce powdered sugar slightly and rely more on natural sweeteners like maple syrup. The flavor will stay full without becoming overly sweet.
Ingredient Selection Tips
Selecting the best ingredients is key to making these no bake pumpkin biscoff cheesecake bars taste like a professional dessert.
- Always use full-fat cream cheese for a stable, rich filling. Low-fat versions may result in a runnier consistency.
- Choose pure pumpkin puree labeled “100% pumpkin” to avoid extra sugars or fillers.
- When buying Biscoff cookies, check that they’re fresh and crisp. Stale cookies can make the crust too soft.
- If using homemade whipped cream, whip until soft peaks form so it folds easily without deflating the filling.
- Let all dairy ingredients come to room temperature before mixing. This ensures the filling blends evenly without lumps.
Once you’ve gathered your ingredients, you’re ready to make the crust that forms the base of these irresistible cheesecake bars.
How to Make the Perfect Biscoff Crust
Crushing and Mixing for the Right Texture
A great no bake dessert starts with a great crust, and this one is no exception. The Biscoff cookie base sets the stage for the creamy pumpkin cheesecake filling, adding both flavor and structure. To achieve the ideal texture, crush the cookies finely but not into dust. You want small crumbs that hold together when pressed yet keep a slight crunch.
You can crush the cookies in a food processor for a consistent texture or place them in a zip-top bag and roll them with a rolling pin. Aim for about two cups of crumbs, which equals roughly 24 Biscoff cookies.
Once crushed, pour the crumbs into a mixing bowl and add melted butter. Stir until every crumb is coated. The butter acts like glue, helping the crust hold its shape while adding a subtle, buttery richness that enhances the caramel flavor of the cookies.
If the mixture seems too dry and crumbly, add a little more melted butter, one teaspoon at a time, until it reaches a sand-like consistency that clumps when pinched. On the other hand, if it feels too wet, sprinkle in a few more crumbs. This balance ensures the crust stays firm after chilling but doesn’t turn greasy.
Pressing and Chilling the Base
Once your crumb mixture is ready, line a square baking dish with parchment paper. This makes it easier to lift the bars out later for clean slicing. Pour the cookie-butter mixture into the pan and spread it evenly across the bottom.
Use the back of a spoon or the bottom of a flat measuring cup to press the crust down firmly. Apply even pressure to compact the crumbs without crushing them completely. This creates a solid foundation that will hold the creamy filling perfectly once set.
After pressing, place the crust in the refrigerator for at least 15 minutes. Chilling helps the butter solidify, which binds the crumbs and prevents the crust from breaking apart when you slice the bars. For an even firmer base, you can chill it for up to 30 minutes while you prepare the cheesecake filling.
If you want to experiment, you can add a pinch of salt or a sprinkle of cinnamon to the crust mixture for a slightly deeper flavor. These small touches give the dessert a subtle warmth that enhances the fall spices in the pumpkin filling.
The key takeaway here is patience. A well-chilled crust sets the tone for the rest of the dessert, providing that satisfying crunch beneath the soft, creamy cheesecake layer. Once your crust is chilled and ready, it’s time to move on to the star of the show: the pumpkin cheesecake filling.
Preparing the Pumpkin Cheesecake Filling
Blending Cream Cheese and Pumpkin
The filling is what makes these no bake pumpkin biscoff cheesecake bars irresistibly smooth and creamy. The goal is to create a texture that’s light yet firm enough to hold its shape once chilled. To start, make sure your cream cheese is fully softened to room temperature. This is key to avoiding lumps and achieving a silky consistency.

In a large mixing bowl, beat the cream cheese until smooth using a hand or stand mixer on medium speed. Once it’s light and fluffy, add pumpkin puree and continue beating until the two ingredients blend completely. This combination gives the cheesecake its signature orange color and creamy texture.
Pumpkin adds moisture, so proper mixing is essential to prevent a watery filling. Scrape down the sides of the bowl as you go to ensure every bit is incorporated. The result should be a velvety base that already smells like fall.
Flavoring the Filling with Spice and Sweetness
Now that your pumpkin and cream cheese mixture is smooth, it’s time to build the flavor. Add powdered sugar, maple syrup, pumpkin pie spice, and vanilla extract. The powdered sugar provides sweetness without adding texture, while the maple syrup brings a rich, caramel-like depth that enhances the Biscoff crust below.
Pumpkin pie spice is the heart of this filling. It combines cinnamon, nutmeg, ginger, and cloves to give the cheesecake that cozy fall warmth. If you prefer a stronger spice flavor, feel free to add a pinch more cinnamon or a touch of ground ginger. Vanilla ties everything together, softening the spice notes and rounding out the flavor.
Mix on medium speed until all ingredients are well blended and smooth. The filling should be thick but not stiff, creamy but not runny. Taste and adjust the sweetness if needed. If you prefer a lighter flavor, a teaspoon of Greek yogurt or sour cream can add a mild tang that balances the sweetness perfectly.
Folding in Whipped Cream for Lightness
The final step is what makes these no bake pumpkin biscoff cheesecake bars so luscious and airy. Fold in whipped cream gently using a spatula. Avoid mixing too aggressively, as you don’t want to deflate the whipped cream’s airy texture. The goal is to keep the filling light and mousse-like, with a smooth and creamy finish.
Once combined, the mixture should hold soft peaks when you lift the spatula. It’s ready to spread over the chilled Biscoff crust. The whipped cream gives the dessert its signature fluffiness while allowing the cheesecake to set beautifully in the fridge.
If you prefer, you can use stabilized whipped cream or store-bought whipped topping for convenience. Both options will work, though freshly whipped cream gives a richer, more natural flavor.
Now that your filling is prepared, you can move on to assembling and setting the layers, turning these simple ingredients into a dessert that’s as impressive as it is effortless.
Assembling and Setting the No Bake Pumpkin Biscoff Cheesecake Bars
Layering for Clean and Attractive Presentation
Now that your crust and filling are ready, it’s time to bring everything together. This step transforms simple ingredients into stunning no bake pumpkin biscoff cheesecake bars that look bakery-perfect and taste like fall in every bite.

Take the chilled Biscoff crust out of the refrigerator and pour the creamy pumpkin cheesecake filling directly over it. Use a spatula to spread the filling evenly, working it into every corner. Smooth the top until it looks level and uniform. This ensures every bar has an equal layer of the spiced crust and pumpkin cheesecake filling.
What makes these no bake pumpkin biscoff cheesecake bars truly shine is their clean, layered look. The golden cookie base contrasts beautifully with the light orange filling, giving the bars a cozy autumn appeal. If you want picture-perfect results, lightly tap the pan on the counter to remove any air bubbles trapped beneath the filling.
To keep the edges neat, use an offset spatula or the back of a spoon to refine the surface. If you plan to top the cheesecake later with whipped cream or crushed cookies, leave a little space near the rim to prevent overflow when slicing.
Chilling and Setting Time for Firm Texture
Once the layers are assembled, refrigerate the cheesecake bars for at least 6 hours, but overnight is best. The chilling process is what transforms this dessert from soft to sliceable. It allows the cream cheese and whipped cream to firm up while maintaining that luscious, velvety texture.
Avoid freezing the bars to speed things up, as that can affect the filling’s smoothness. Patience pays off here. A slow chill creates the perfect consistency that makes no bake pumpkin biscoff cheesecake bars so irresistible.
If you’re making these bars ahead for a special event or holiday dinner, prepare them the night before and let them rest in the fridge until serving time. Before cutting, run a sharp knife under warm water, dry it, and slice cleanly through the layers. Repeat between cuts for perfect squares.
The result is a dessert that’s firm enough to hold its shape yet creamy enough to melt in your mouth. Every bite captures the perfect blend of spiced Biscoff cookies and rich pumpkin cheesecake flavor.
Once chilled, your no bake pumpkin biscoff cheesecake bars are ready to decorate. The next part covers how to make them look even more impressive with simple garnishes and creative serving ideas.
Garnishing and Serving Ideas for No Bake Pumpkin Biscoff Cheesecake Bars
Garnish Inspirations
The final touches make your no bake pumpkin biscoff cheesecake bars truly stand out. Presentation matters, especially when serving a dessert as beautiful as this one. A few simple garnishes can elevate these creamy bars from homemade to show-stopping.
Start by adding a swirl of freshly whipped cream on top of each bar. The soft peaks create a bakery-style finish that looks elegant and adds extra creaminess. For a bit of crunch, sprinkle crushed Biscoff cookies over the whipped cream. Their spiced sweetness not only enhances the flavor but also reinforces the dessert’s signature cookie base.
If you want an even more eye-catching touch, lightly dust the tops with pumpkin pie spice or cinnamon. This adds warmth and aroma, making each bite even more inviting. For a festive twist, drizzle a small amount of caramel or maple syrup over the bars just before serving. The combination of creamy pumpkin, caramel, and Biscoff spice creates the perfect fall dessert harmony.
Serving Suggestions for Occasions
These no bake pumpkin biscoff cheesecake bars are versatile enough for any occasion. Their rich yet refreshing texture makes them an ideal ending to a Thanksgiving dinner, Friendsgiving gathering, or cozy weekend meal.
For a casual setup, cut the bars into squares and serve them on a rustic wooden tray lined with parchment paper. This gives a warm, homemade vibe that fits the fall season. For formal dinners, arrange them on a white platter with whipped cream piped neatly across the top. A few cookie crumbs sprinkled around the edges make for a professional presentation without extra effort.
You can also turn this recipe into a layered dessert served in clear glasses or small jars. Alternate layers of Biscoff crust crumbs, pumpkin cheesecake filling, and whipped cream for a creative take that’s easy to transport and looks gorgeous on dessert tables.
When serving at larger events, cut the bars into bite-sized squares and place them in cupcake liners. This makes them easier to handle and ensures clean presentation for guests. The mini versions are just as creamy and flavorful, making them perfect for dessert buffets or potlucks.

Pairing with Beverages
These no bake pumpkin biscoff cheesecake bars pair beautifully with warm fall drinks. Try serving them with pumpkin spice lattes, chai tea, or hot apple cider to bring out their seasonal flavor. If you prefer something lighter, a cup of black coffee or a chilled glass of milk complements the creamy texture perfectly.
For special occasions, consider pairing them with a spiced rum cocktail or a festive mocktail made with sparkling apple cider and cinnamon syrup. The sweet spice of the drink enhances the caramel notes of the Biscoff crust while balancing the pumpkin’s natural richness.
Whether served at a cozy family dinner or an elegant holiday party, these no bake pumpkin biscoff cheesecake bars always make a stunning centerpiece. Next, we’ll look at how to store, freeze, and prepare them ahead of time to keep them fresh and delicious.
Storage, Freezing, and Make-Ahead Tips
How to Store in the Refrigerator
One of the best things about these no bake pumpkin biscoff cheesecake bars is how well they store. After preparing and chilling, cover the pan tightly with plastic wrap or transfer individual slices into airtight containers. Refrigerate for up to five days to maintain their freshness and creamy consistency.
The Biscoff crust stays firm while the pumpkin cheesecake filling remains smooth and light. For best results, store the bars without whipped cream topping, then add it just before serving. This keeps the texture perfect and prevents any sogginess from developing.
If you’re hosting guests, prepare the bars a day or two in advance. They’ll be fully set, easy to cut, and ready to serve straight from the fridge, saving you time and stress on the day of your event.
How to Freeze Without Losing Quality
Yes, these no bake pumpkin biscoff cheesecake bars freeze beautifully. Freezing them properly allows you to enjoy their fall flavors long after the holidays.
To freeze, cut the cheesecake into bars and wrap each piece tightly in plastic wrap. Place the wrapped bars in a freezer-safe bag or airtight container to protect them from freezer burn. They’ll stay good for up to two months.
When you’re ready to serve, transfer the bars from the freezer to the refrigerator and let them thaw overnight. This slow thawing process helps maintain their creamy, smooth texture. Avoid thawing at room temperature, as it can cause condensation and soften the crust.
If you like a firmer texture, you can serve the bars slightly chilled, almost frozen. The consistency becomes dense and creamy, similar to an ice cream cheesecake.
Make-Ahead Planning for Holidays
These no bake pumpkin biscoff cheesecake bars are a dream come true for busy holiday planners. Because they’re no-bake, you can easily prepare them a day or two before your gathering without any worry about oven space or last-minute stress.
Here’s a simple make-ahead plan:
- Prepare the crust and filling the day before.
- Assemble and refrigerate overnight for at least six hours.
- Just before serving, garnish with whipped cream, crushed cookies, or spice dusting.
If you need to travel with the dessert, keep the bars in the pan covered with plastic wrap or foil and place them in a cooler with ice packs. They’ll stay firm and chilled until you’re ready to serve.
You can even prepare two batches at once — one for the upcoming weekend and one to freeze for a future event. This make-ahead flexibility is what makes these no bake pumpkin biscoff cheesecake bars such a practical and crowd-pleasing dessert.
Up next, we’ll cover expert tips and troubleshooting techniques to make sure your cheesecake bars turn out perfect every time.
Expert Tips and Troubleshooting
Even though these no bake pumpkin biscoff cheesecake bars are simple to prepare, a few expert tips can help you achieve bakery-level results every single time. Whether you’re new to no-bake desserts or a seasoned cook, these pointers ensure your bars turn out creamy, stable, and beautifully layered.
How to Prevent a Soggy Crust
A common issue with no-bake desserts is a crust that becomes too soft or soggy. To avoid this, make sure you crush your Biscoff cookies finely and mix them thoroughly with melted butter until every crumb is coated. Press the mixture firmly into the pan and chill it for at least 15 minutes before adding the cheesecake filling.
If you live in a humid area, extend the chilling time to 30 minutes or even freeze the crust for 10 minutes to help it set faster. Another helpful trick is to brush a thin layer of melted white chocolate over the crust before adding the filling. This creates a moisture barrier that keeps the crust crisp while adding a touch of sweetness.
Avoiding Lumpy or Runny Filling
To create the smooth, velvety texture that makes these no bake pumpkin biscoff cheesecake bars so irresistible, start with room-temperature cream cheese. Cold cream cheese tends to clump and prevents the filling from becoming silky.
Always beat the cream cheese first until fluffy, then gradually add pumpkin puree, sweeteners, and spices. Mix just until combined. Overmixing can cause too much air in the batter, which might make it soft and less stable.
If your filling still feels loose after mixing, chill it for 15–20 minutes before layering it on the crust. The cold will help it thicken slightly and make it easier to spread evenly.
How to Get Clean, Professional-Looking Cuts
Presentation matters, and getting clean slices is easier than you might think. Once the no bake pumpkin biscoff cheesecake bars are fully chilled, use a long, sharp knife for cutting. Dip the knife in hot water, wipe it dry with a towel, and make one firm cut through the bars. Wipe and reheat the knife between each slice to keep the edges clean and neat.
If you plan to serve these bars at an event, you can even slice them ahead of time and refrigerate the portions on a serving tray. Just add the whipped cream and toppings right before serving for a fresh, polished look.
Bonus Tips for Perfect Texture and Flavor
- Use full-fat dairy for a richer taste and better setting.
- Chill for a minimum of six hours, or overnight if possible, for the ideal texture.
- Do not freeze the bars before they’ve fully set in the fridge.
- Taste the filling before assembling to adjust the sweetness or spice level.
- Decorate right before serving to maintain freshness.
With these simple but effective techniques, your no bake pumpkin biscoff cheesecake bars will not only look amazing but taste like something straight from a professional bakery.
Conclusion
No bake pumpkin biscoff cheesecake bars combine everything we love about fall desserts: the warmth of pumpkin spice, the sweetness of caramelized cookies, and the smooth texture of no-bake cheesecake. They’re simple to make, elegant to serve, and delicious enough to impress any guest.
This dessert’s biggest strength lies in its balance of ease and flavor. With no oven required, you can prepare it ahead of time and let it chill until it’s ready to serve. The Biscoff crust provides a buttery crunch, while the pumpkin cheesecake layer brings cozy comfort to every bite. Whether it’s Thanksgiving, a weekend gathering, or a quiet evening at home, these no bake pumpkin biscoff cheesecake bars will always hit the spot.
If you want to explore more easy, no-bake desserts that fit perfectly into your fall menu, this recipe is a great place to start. It’s foolproof, flavorful, and beautifully captures the season’s best ingredients.
FAQs About No Bake Pumpkin Biscoff Cheesecake Bars
Can you add oats to cheesecake bars?
Yes, you can. While oats aren’t a traditional part of this recipe, they can add a pleasant, rustic texture to the topping or crust. If you’d like to include oats, sprinkle a small amount of toasted oats over the finished bars before serving. This adds a light crunch that pairs nicely with the creamy pumpkin filling and spiced Biscoff base. However, keep the amount minimal so it doesn’t overpower the flavor or texture of your no bake pumpkin biscoff cheesecake bars.
What makes these cheesecake bars set without baking?
These bars rely on the combination of cream cheese, whipped cream, and powdered sugar to firm up as they chill. The air incorporated during mixing gives the filling its light texture, while the fat in the cream cheese helps it solidify once cold. When refrigerated for at least six hours, the mixture sets into a sliceable, mousse-like texture without needing an oven. This is what makes no bake pumpkin biscoff cheesecake bars so easy and reliable for any home cook.
Why use Biscoff cookies instead of graham crackers?
Biscoff cookies offer a deeper, caramelized flavor compared to traditional graham crackers. Their warm spice notes pair perfectly with pumpkin, enhancing the overall fall character of the dessert. They also have a slightly crispier texture, which creates a more stable base for no bake pumpkin biscoff cheesecake bars. While graham crackers work as a substitute, Biscoff cookies elevate the taste and aroma, making the dessert truly unforgettable.
How do you cut cheesecake bars neatly?
For perfect slices, always chill your no bake pumpkin biscoff cheesecake bars completely before cutting. Use a long, sharp knife dipped in hot water, wipe it dry, and make smooth, steady cuts. Rinse and reheat the knife between each slice to keep the edges clean. Using parchment paper under the crust also makes it easy to lift the whole dessert out of the pan before slicing. This method ensures each bar looks clean and professional.
Can you freeze no bake pumpkin biscoff cheesecake bars?
Absolutely. These cheesecake bars freeze well and maintain their creamy consistency once thawed. To freeze, wrap each bar tightly in plastic wrap and place them in an airtight container. Freeze for up to two months. When you’re ready to enjoy them, move the bars to the refrigerator and let them thaw overnight. This gradual thawing keeps the filling smooth and prevents the crust from becoming soggy. You can serve them slightly chilled for a firmer, ice cream-like texture or fully thawed for a soft, creamy bite.